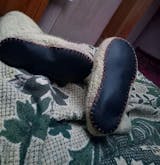
It was the first Joe's Toes knitting pattern and the original version which used the now discontinued Sirdar Squiggle Super Chunky is reproduced below. We now use pure wool yarns, and would recommend our updated version of the pattern here.
To call it a pattern still feels a little over the top as it is just a simple strip of knitting which is then given it's shape by the addition of our felt soles.
Nonetheless our Crossover is a great little pattern. It is so easy to knit in simple garter stitch which is also known as "plain knitting". The finished slippers are cosy, lightweight and very packable.
ORIGINAL CROSSOVER
Ideal if you still have Sirday Snuggly or similar yarns in your stash.
For each pair of slippers you'll need two pairs of felt soles - one plain felt and one with latex on the bottom for a little bit of grip.
We recommend a minimum of two layers, not only for comfort, but also to hide the joins when stitching between the two sole layers leaving the slipper smooth both inside and out. You can even add extra pairs of our soles to give more cushioning or more grip, for example you might like to add our super tough, waterproof
Vibram rubber soles and our
real suede leather soles.
To get started make a note of the number of holes on your chosen size of sole.
Your tension should be 13 stitches and 24 rows (12 ridges) for a 10cm (4") square.
Using 5.5 mm needles (US size 9, UK and Canadian size 5) cast on 11 stitches for size 1-2, 12 stitches for sizes 3 to 7, 13 stitches for size 8-10 and 14 stitches for bigger sizes.
Knit twice as many rows as you have holes e.g. if the sole has 68 holes knit 136 rows.
Cast off leaving a short tail to darn in later. Our kits now include extra strong waxed thread and a large blunt needle for sewing the soles instead of the yarn shown here.
Using a
blunt needle start stitching the LONG edge from one corner to the centre front of the slipper. There's a small notch to show the correct starting point.
The key to even spacing is to stitch one rib of the garter stitch to each hole and work your way right round.
Make any joins on the underside of the sole so they will be hidden when you stitch on the outsole.
When you get back to the toe continue in the same direction stitching the short edge over you first stitches.
Tuck the other short edge inside and stitch this to the knitted upper close to where it joins the sole.
Reverse the overlap for the other foot!
The outsole is attached by stitching through both (or all if you're using more than two!) layers of soles. Here we are attaching it with back stitch, but you can use any stitch you would like e.g. blanket stitch always looks cosy. Use the space between the inner and outer sole to hide the joins in your thread or yarn.

This will give you a neat finish both outside,

and inside.
Admire your new slippers!


 This will give you a neat finish both outside,


