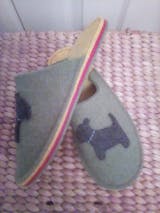
The first question everyone asks is how does a slipper go together? It's easy - here are our simple instructions. We've also added video on youtube to show you how we stitch them.
If you don't already have a kit you can choose yours here.

So here we have one completed slipper and all the parts to make the other foot. Now let's take it step by step........
..
This is the top (also called the upper or vamp) - you need 2 of these for one pair - there's no difference between right and left - so don't worry about muddling them up.


Then we have the outsole in grey (the one that hits the floor), the midsole (for extra cushioning) in red, and the insole (which goes against the foot) in green. These all come in rights and lefts. Midsoles and insoles are interchangeable.

1. Thread your needle with a good long piece of thread (about a metre will get you half way round). Take your midsole, find the little notch in the front and, using the holes, make three or four stitches in the same place to secure the thread. The exact position isn't important.


2, Stack up the outsole, midsole, insole and top. Line up all the soles - each one has three little notches to help. and check that you haven't got parts from the wrong foot or have anything upside down. Bring your needle through the holes to the top to start sewing. When you sew always take the needle straight up and down through all the holes.


3, Start stiching around the slipper - using any stitch you like. In this example we're using a traditional back stitch - over two holes and back one hole. Pull the thread firmly through each set of holes so that the layers will stay in place.


4, When you've nearly run out of thread and need to join in a new piece stop half way through the stack of soles (either side of the midsole is OK). This will ensure the slipper looks neat inside and out. Take the needle off the old thread, knot on your next length of yarn and thread up, take care to tie the knot nice and close to the sole. Carry on in the direction you were going.

5. When you get to the end of the top part it's a good idea to do an extra stitch to strengthen the join - just stitch into the same holes twice.

6. Stitch around the heel and when you get to the little notches on the other side start to include the top in your stitching. As you work your way around the slipper you'll see it taking shape.
7. Once you're back where you started, poke the needle between the layers. Do a couple of hidden stitches on one of the inner layers to secure the end of the thread. Thread the needle out to one side and trim the end off. Your slipper is complete.


Enjoy your new slippers!

Choose your kit here!


