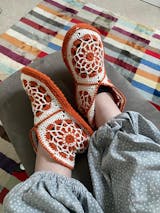
 How to Make Joe's Toes baby crossover slippers.
These little slippers are a quick and easy knit and an ideal beginner project. The upper is a simple strip of garter stitch, its top edge finished with a row of crochet chain (or knitted alternative) for a snugger fit. The upper is stitched to the soles using the pre-punched holes. The knitted strip for all sizes should be 5cm wide. We use 5mm needles but your knitting tension may require smaller or larger needles to get the right width.This pattern is sized for newborn, 2-6 months and 6-12 months. Our Bruna crochet baby boot pattern can be found here.
Step 1.
With 5mm needles cast on 9 stitches for all sizes. Knit 54 rows for newborn size, 68 rows for 2-6 month size and 80 rows for 6-12 month size. Cast off.
Step 2.
Finish the top edge to reduce stretch and help give a snugger fit. Using a 4mm crochet hook work a row of slip stitch by chaining through the next-to-end stitch of every other row of knitting. This will be the top edge of the slipper.
The same effect can be achieved using a knitting needle to pick up the end stitch of knitting from every other row then immediately casting off these stitches. The finished piece should lie flat, not stretched or puckered up.
Step 3.
We've made a video to show how we attach the sole on our knitted slippers. For these baby sizes we stitch with the yarn as we don't need the extra strong thread.
Attach the sole. Take care when you start the stitching that you have the sole the right way up to create a pair. Newborn size soles are symmetrical but larger sizes have an obvious right and left. Find the hole nearest the centre notch at the toe of the sole and start stitching the long edge (not the one you just edge-finished) with the bodkin provided. Take the bodkin down through the first hole, back up through the next hole, pick up the last knitted stitch, go back down through the same hole, move on to the next hole. Repeat, picking up one rib (i.e. every other row) for each hole in the sole until you are back at your first stitch.
Step 4. Stitch the crossover in place by folding one short edge in so that it lines up with your stitches on the INSIDE of the slipper – most people like to do this toward the inside of the foot. Slip stitch it in place through the knitting, close to the sole.
Next, stitch the other short edge to the outside of the slipper, again using a slip stitch. Finish off securely and darn in the ends.
Make the other foot in the same way. Don’t forget to wrap the crossover in the opposite direction for the other foot.
The finished slippers can be hand-washed as you would any woollen article.
We love to see your photos! If you are pleased with your little shoes do send us a photo for the gallery to amanda@joestoes.co.uk . If you hit any snags just get in touch and we'll be happy to help.
Please note these slippers are intended for pre-walkers. If the little person starts to walk you might like to add a pair of Joe’s Toes rubber or suede soles or to use a product such as “Slipper-Stop”.
Additional soles and kits can be found under the "kits and bits" section of the website.

 How to Make Joe's Toes baby crossover slippers.


